
Technical Researcher at the University of Piraeus, Department of Digital Systems.
In this tutorial, we will set an automated pipeline to build a Next.js Docker image and then push it to GitLab container registry. We will start by creating our ci file and then register a runner to execute our pipelines.
As always, here is the official documentation link.
Prerequisites
The only thing required is a GitLab project containing our source code and Dockerfile.
GitLab Runners
Overview
A GitLab Runner is an open source application that executes the jobs of a pipeline. We can install this program in four different ways:
Local server
Docker container
VM
Cloud Provider
For this example we will use a Docker container, as it simplifies the whole process.
Runners can also be categorized as:
Shared: All project in a GitLab instance can use this Runner
Group: All projects in a specific group can use this Runner
Project: Only a specific project can use this Runner
For this example we will create a Runner that will be assigned to a specific Project.
Executors
Now that we know what Runners are, let's dive a bit deeper on how they work. An executor is the environment on which our pipeline will run. These also come in different flavors, so some examples include:
Virtual Box
Shell
Docker
Kubernetes
...
So for example, a Shell executor will run the pipeline directly on the host shell, a Docker executor will create a container to execute the pipeline and so on.
Yes, we will be using a Docker executor. Good guess!
Creating our CI/CD
Time to start implementing our pipeline. In order to do that we need to take a few setup steps. These include:
Create a ci
.ymlfileCreate a Runner container
Register the Runner to the GitLab project
1. Starting with the ci file
In order to run a pipeline on a GitLab project we need to create a .gitlab-ci.yml file on the root of our project's source code.
Let's see an example:
variables:
  DOCKER_TLS_CERTDIR: "/certs"

docker-build:
    image: docker:latest
    stage: build
    services:
        - docker:dind
    script:
        - echo $CI_REGISTRY_PASSWORD | docker login -u $CI_REGISTRY_USER $CI_REGISTRY --password-stdin
        - docker build -t $CI_REGISTRY_IMAGE:latest .
        - docker push $CI_REGISTRY_IMAGE:latest
Here's what's going on:
The
docker-buildjob uses the latest image of Docker as base imageWe name this stage
builddind(“Docker-in-Docker”) means running Docker within a Docker container. Thus, a new Docker engine is spawned within a container, providing an isolated environment for managing containers.After that, we begin our script commands:
We login to our repository's registry using the
docker logincommand. Notice how we can directly pull thePASSWORD,USERandREGISTRYvariables from the platform.We build our application image
We push the image to the repository registry
You can find more information in the official documentation:
2. Creating our Runner container
As we previously said, we need to create a docker container that has the Runner software listening for requests. Using a docker-compose.yml file we can describe the service like so:
version: '3.8'

services:
  gitlab-runner:
    image: gitlab/gitlab-runner:alpine
    container_name: gitlab-runner
    volumes:
      - /var/run/docker.sock:/var/run/docker.sock
The only thing to notice here is how we mount the host docker.sock inside the container, in order to be utilized by the Runner service.
Then we simply docker compose up -d !
3. Register the Runner
And the final part is to register our Runner on the GitLab repository. Here's what we need to do:
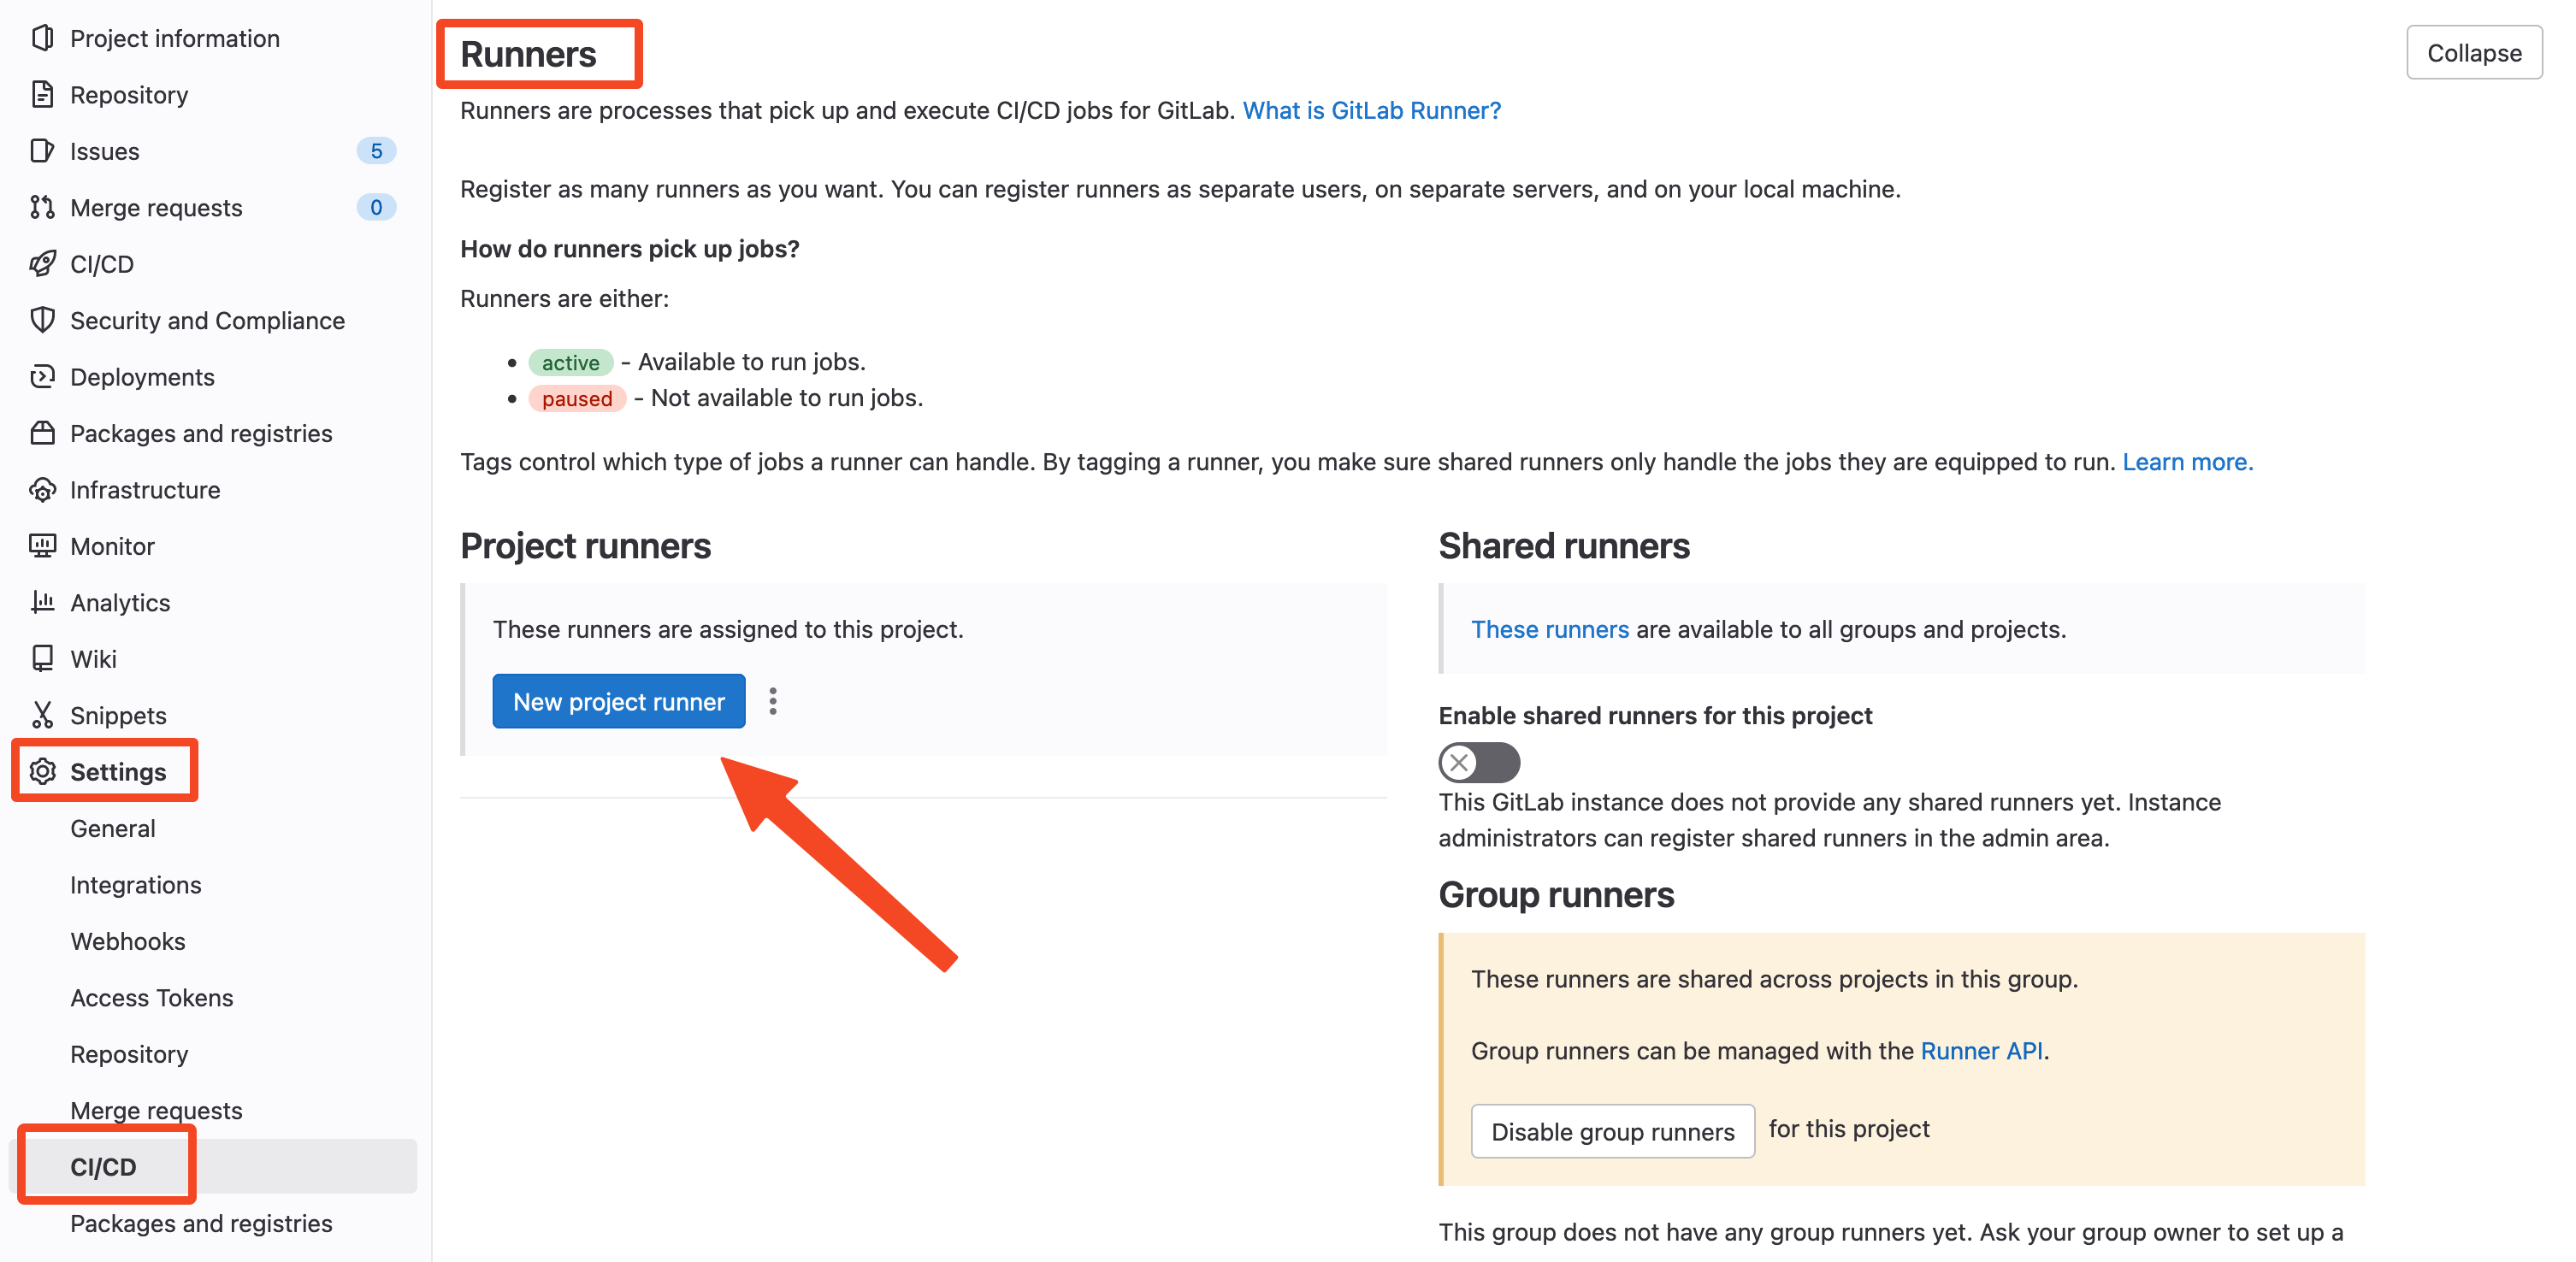
Firs navigate to your GitLab project Settings > CI/CD and expand the Runners tab. Here we need to create a new project Runner configuration. Click on the New project runner button.
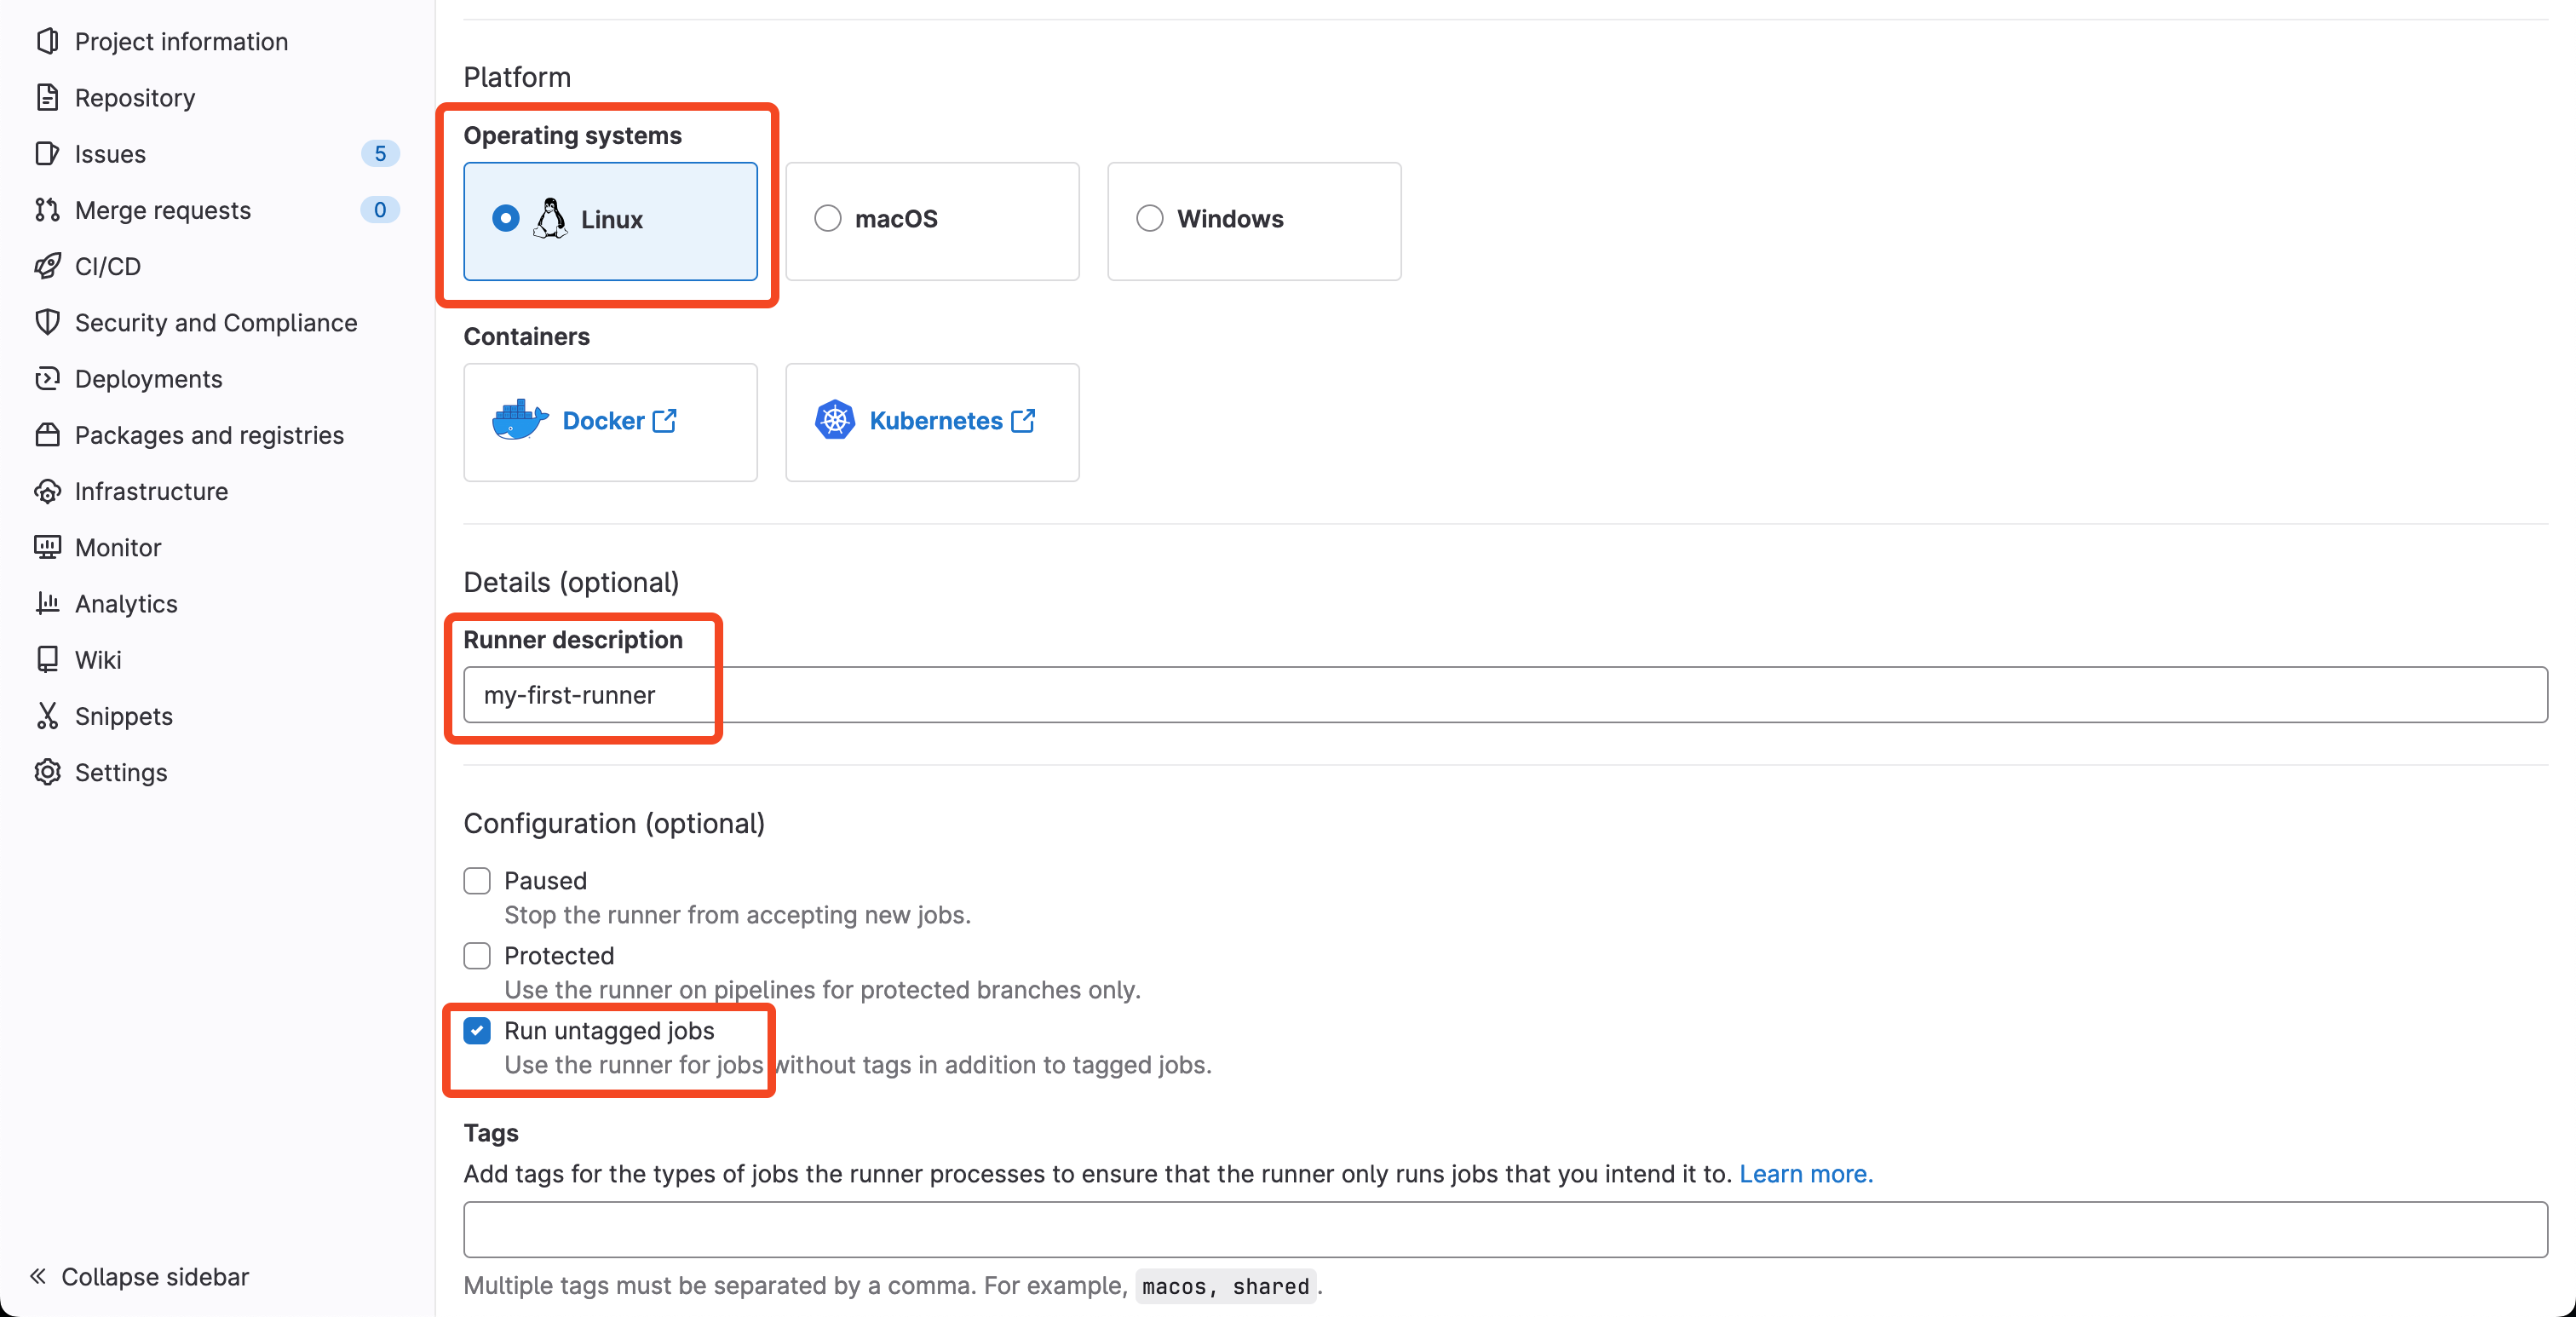
The configuration needed for this is:
Select Linux as operating system
Provide a Runner description
Check the Run untagged jobs, as we won't be using tags
After clicking the submit button, our Runner configuration is ready. The important thing to keep here is the --url parameter provided by GitLab, as well as the --token
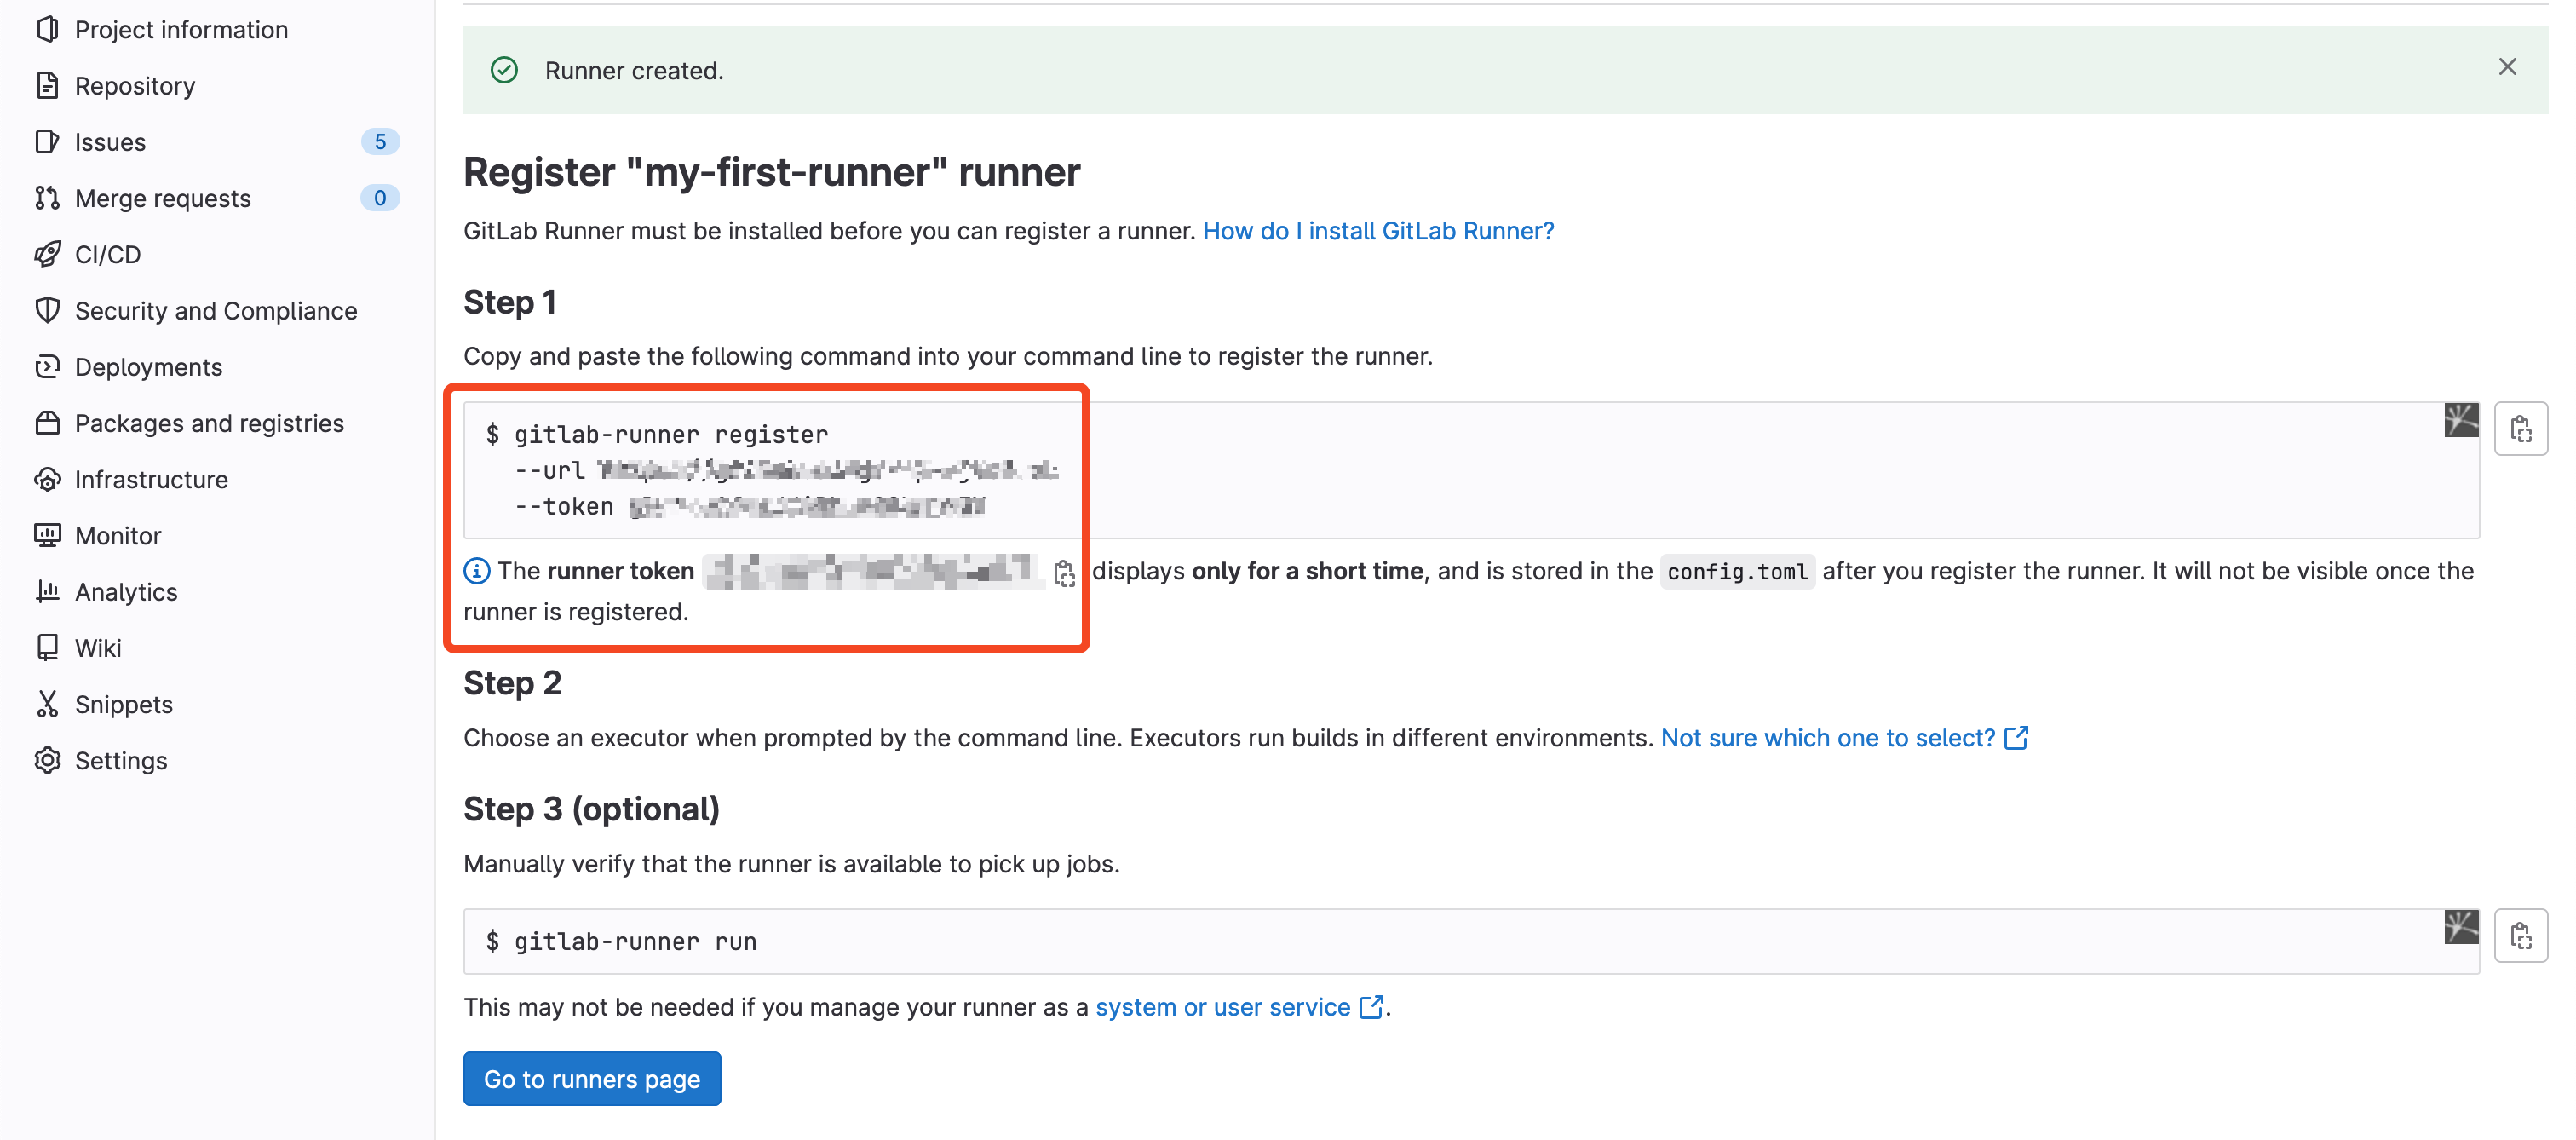
Great, now we just need to register this configuration to our Runner container!
To do that we need to enter the container shell so that we can execute the register command. To do that type:
docker exec -it <container-name> bash
Now, inside the Runner container, we execute the following command:
gitlab-runner register -n \
  --url "URL" \
  --registration-token REGISTRATION_TOKEN \
  --executor docker \
  --description "My Docker Runner" \
  --docker-image "docker:24.0.5" \
  --docker-privileged \
  --docker-volumes "/certs/client"
Running the pipeline
That was it! 🎉
The Runner is registered and all that's left to do is run our pipeline. We can do that from the project CI/CD > Pipelines tab.
After the image gets built, it will be automatically to our GitLab container registry with the tag :latest.
Till next time! ✌️


