


How to add GitHub OAuth to your Node.js application 🔐
Because html forms are lame in 2022


Table of contents
Okay, so you've got your Node.js project up and running, with your sign-in / up routes and all. But you want to add this fancy Sign in using GitHub button that you see on every major tech website. Well, this article is for you then!
For this tutorial, we will use vanilla Node.js and Express, as there really is no need for any extra middleware like Passport.js. It's a really simple process and it only requires you to follow a few basic steps.
Also, make sure to take a look at the official documentation page for a more detailed walkthrough.
The OAuth flow
Let's take a quick look at how GitHub OAuth works under the hood before we start to implement anything.
- The user clicks on the sign-in button and gets redirected to GitHub, where he can authorize your application.
- GitHub then redirects back to your application, providing us with a temporary code as a URL parameter (query string).
- Your application can then exchange this temp code for an access token. This token can be used to retrieve user data.
Creating an OAuth app
First of all, we need to create a GitHub OAuth app.
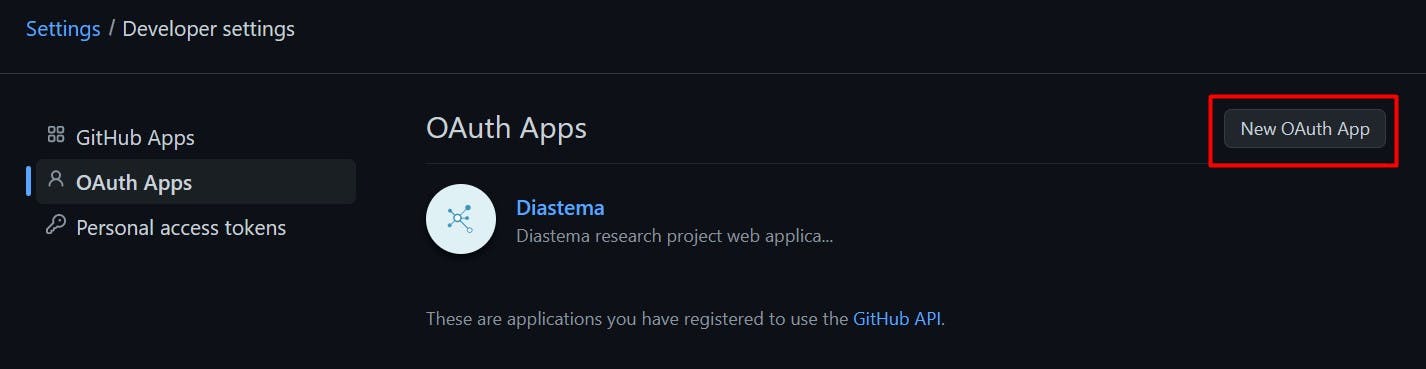
Head over to your GitHub account settings, and then navigate to Developer settings at the very bottom. Select the OAuth Apps option, and then click New OAuth App.
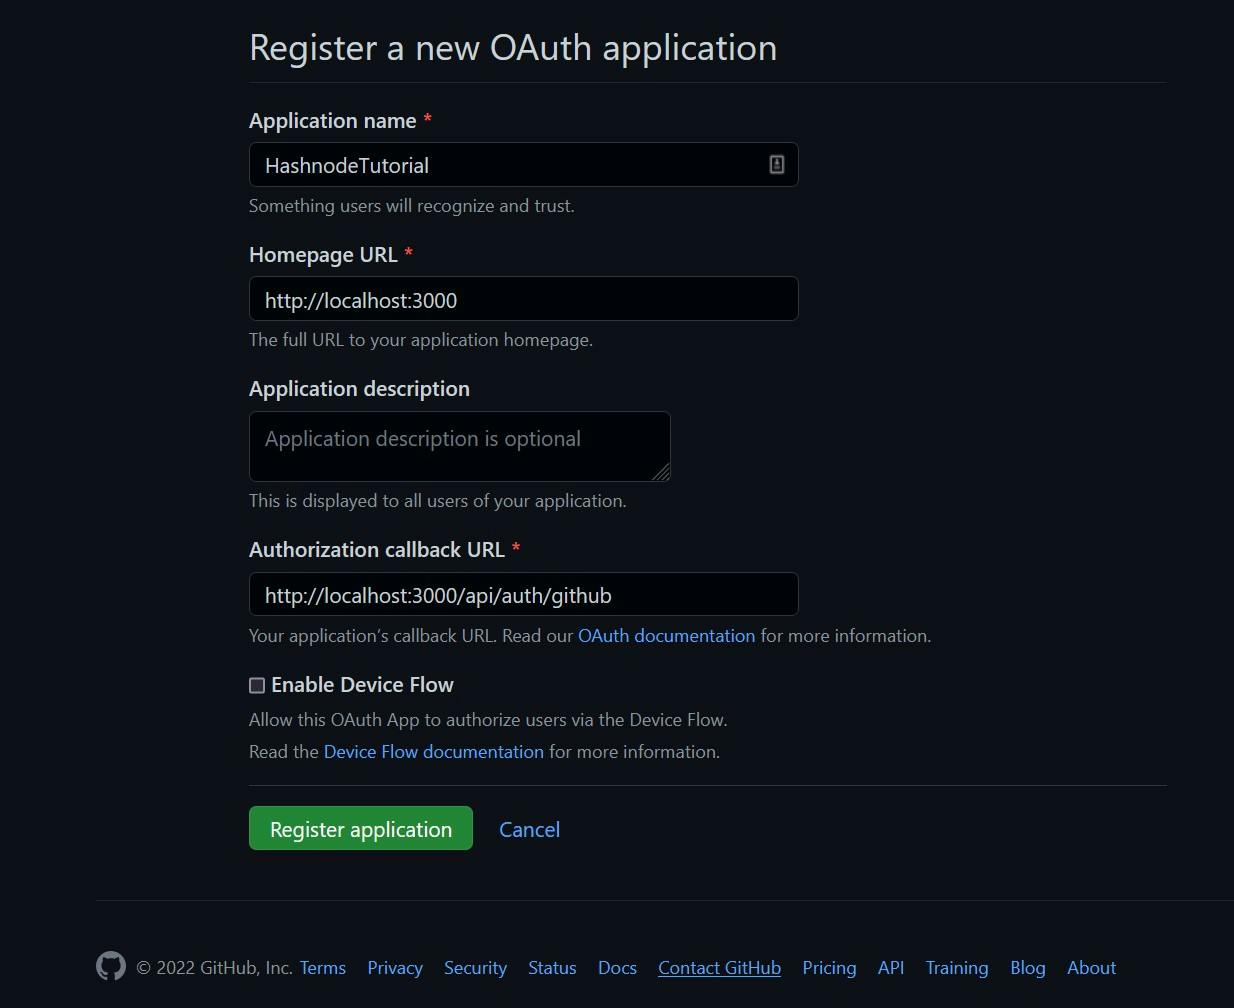
Now you need to fill in some information, regarding your application. This will be:
- Application name: Give your OAuth application a name.
- Homepage URL: This is your application home page URL including the port that it is running at.
- Application description: Pretty self-explanatory, not required for this demo.
- Authorization callback URL: This is the most important field. This is your application server endpoint that will receive a request with the temporary code.
Sidenote: You can change all of this later, don't worry if you mistyped something.
Click the Register application button.
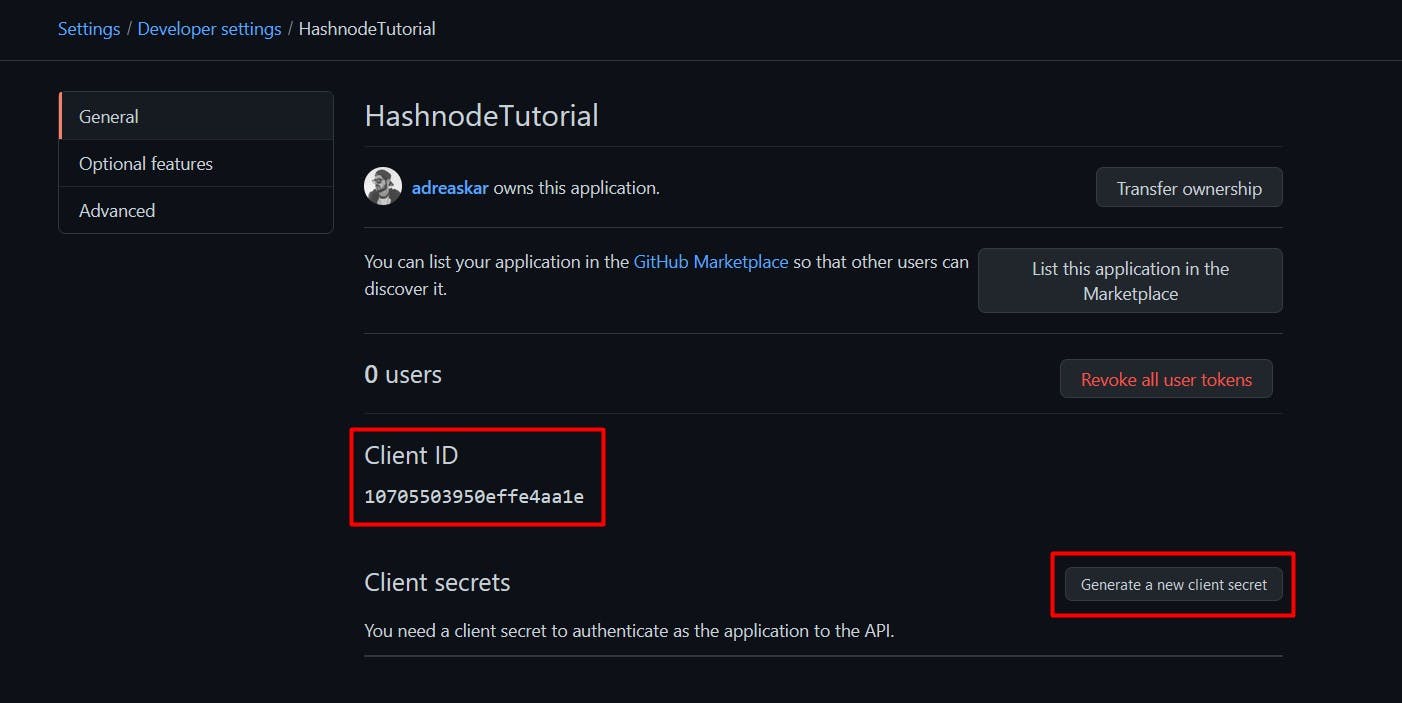
The last thing we need to do is to generate a client secret. Once you generate that, make sure to take note of both client secret and the client id.
Important note: Write down the client secret at the moment of generation because you will not be able to see it again after a page refresh. (You are also prompted to do so by GitHub as well).
Client side
Fire up your VS Code champ, it's coding time!
Let's set up our Sign in with GitHub button on our client side. The script below will trigger a redirect to the GitHub authorization page, where the user will give your application access.
As you can see this process requires our client id and redirect URL that we set earlier.
<button id="githubAuth">Sign in with GitHub</button>

<script>

    const clientId = "10705503950effe4aa1e"; //Your client id here
    const redirectURL = 'http://localhost:3000/api/auth/github/';
    const url = "https://github.com/login/oauth/authorize?client_id="+clientId+"&redirect_uri="+redirectURL;

    $("#githubAuth").click(function() {
        window.location.href = url;
    });

</script>
Click the button and you will see the following screen:
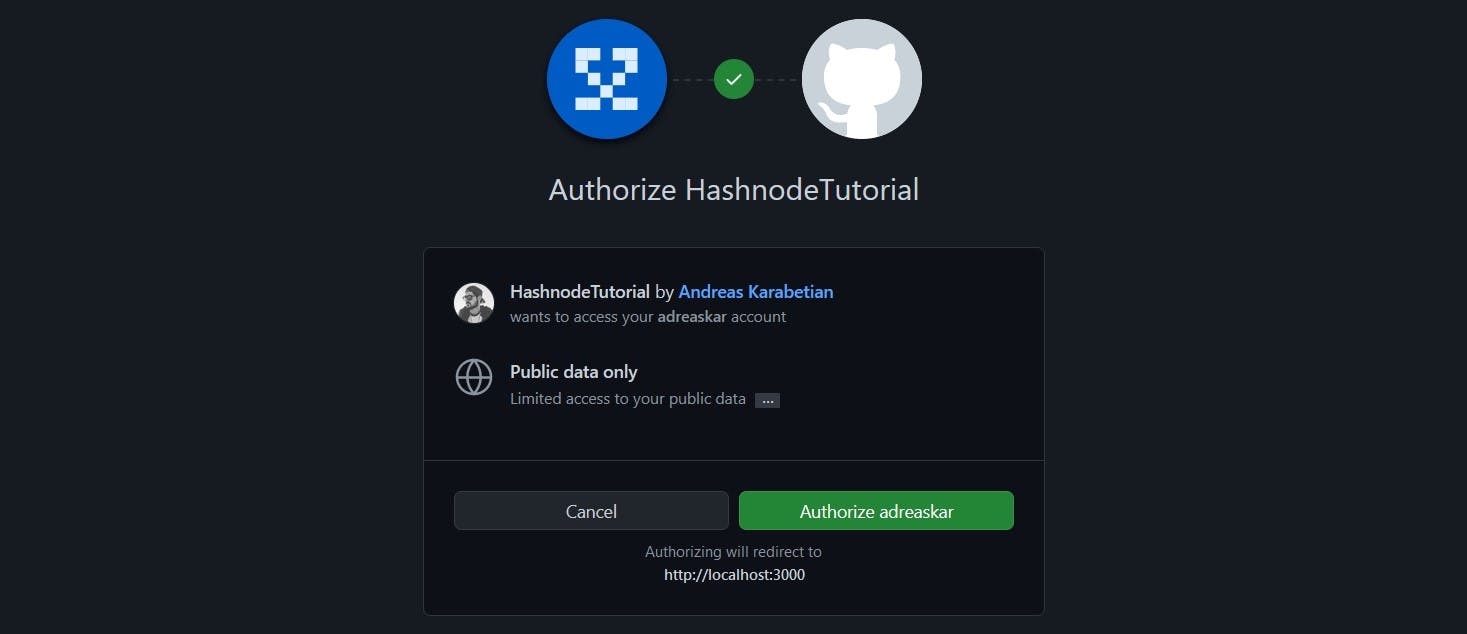
By clicking the green Authorize "username" button you will be redirected to the URL that we set previously, in this case: http://localhost:3000/api/auth/github/, with a query string code.
We then need to extract this information in order to proceed.
Server side
Time we build our API so that we can execute some HTTP requests.
As mentioned, a request will be sent on the /api/auth/github/ endpoint. This will also require our client id as well as our client secret.
It's good practice to store these values in a .env file, but for this example we will simply use local variables.
So let's build that:
const express = require('express');

const app = express();

const clientId = '10705503950effe4aa1e'; // Your client id
const clientSecret = 'SECRET'; // Your client secret

app.route("/api/auth/github/")
  .get((req,res) => {
      //Get the temp code from the request
      const code = req.query.code;
      console.log("[INFO] - Got the temp code: " + code);
  });

app.listen(3000);
console.log('App listening on port 3000');
Great, now that we have our temp code, we can make a POST request to https://github.com/login/oauth/access_token in order to get our access token.
For this request, we will also need our client id and client secret. To make the POST request, I'm using the node-fetch library, but it's totally up to preference.
Let's create this functionality:
// Building the request URL
const url = "https://github.com/login/oauth/access_token?client_id="+clientId+"&client_secret="+clientSecret+"&code="+code;

//Get the access token from GitHub
fetch(url, {
    method: 'POST',
    headers: { 'Accept': 'application/json' }
})
.then(res => res.json())
.then(json => {
    const token = json.access_token;
    console.log("[INFO] - Got the access token: " + token);
});
Cool, now let's use this token to receive user information.
All we have to do is another POST request to this URL: https://api.github.com/user. We also need to include the access token we just acquired as a header parameter. Here's the code block:
//Get the user data from GitHub
fetch("https://api.github.com/user", {
    headers: { 'Authorization': 'token ' + token }
})
.then(res => res.json())
.then(json => {
    const user = json.login;
    const organization = json.company;
    const email = json.email;
    const image = json.avatar_url;

    console.log("[INFO] - Got github data for user: " + json.login);
});
And that was it! 🎉 We have successfully acquired the user information we need for our application.
So to put it all together now, here's the finalized express application:
const express = require('express');
const fetch = require('node-fetch');

const app = express();

const clientId = '10705503950effe4aa1e'; // Your client id
const clientSecret = 'SECRET'; // Your client secret

app.route("/api/auth/github/")
  .get((req,res) => {
      //Get the temp code from the request
      const code = req.query.code;
      console.log("[INFO] - Got the temp code: " + code);

      // Building the request URL
      const url = "https://github.com/login/oauth/access_token?client_id="+clientId+"&client_secret="+clientSecret+"&code="+code;

      //Get the access token from GitHub
      fetch(url, {
          method: 'POST',
          headers: { 'Accept': 'application/json' }
      }).then(res => res.json())
        .then(json => {
          const token = json.access_token;
          console.log("[INFO] - Got the access token: " + token);

          //Get the user data from GitHub
          fetch("https://api.github.com/user", {
              headers: { 'Authorization': 'token ' + token }
          })
          .then(res => res.json())
          .then(json => {
              const user = json.login;
              const organization = json.company;
              const email = json.email;
              const image = json.avatar_url;

              console.log("[INFO] - Got github data for user: " + json.login);
        });
      });
  });

app.listen(3000);
console.log('App listening on port 3000');
Note: GitHub OAuth App utilizes the scope concept, something that this tutorial does not cover. Scopes determine what permissions your OAuth App has. By default, your OAuth App has access to some basic public information about the requested user.
You can find more information on scopes at the official documentation page.
Conclusions
Now you can use GitHub as a method to manage user data for your application. There are a lot more uses to the GitHub OAuth Apps that you can utilize in your future applications, but that's a story for another post ;)
Till next time! ✌️